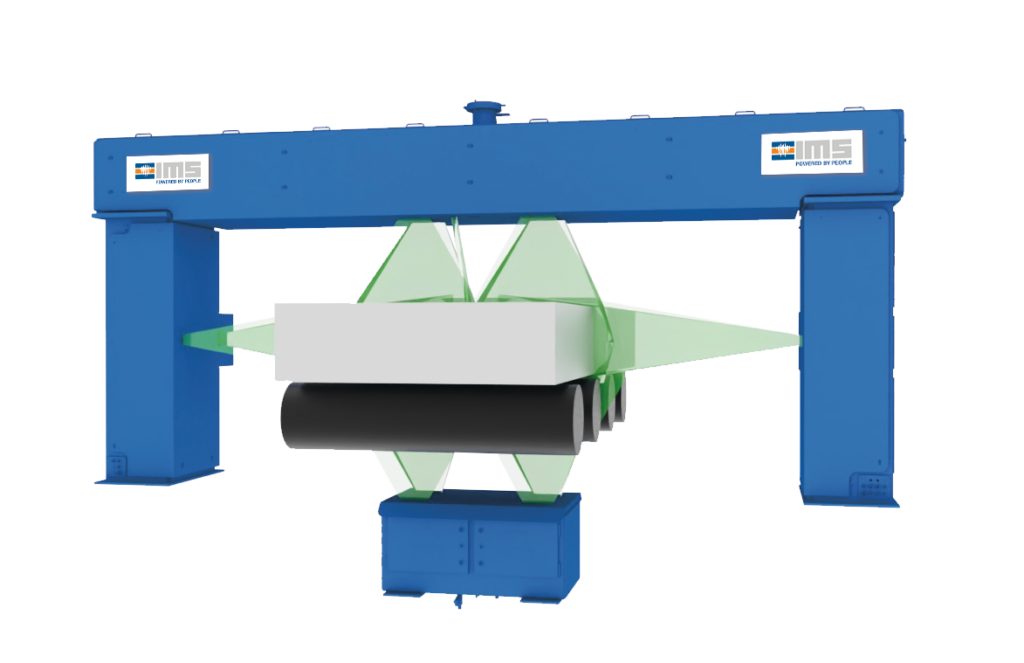
Rolling Ingot Dimension Measuring System
Rolling Ingot Dimension Measuring System
Rolling ingots are usually produced in an ingot casting process, resulting in high-quality ingots with precise dimensions. Nevertheless, it is still necessary to prepare these ingots for the actual rolling process.
The rolling ingot dimension measuring system records the exact dimension of an ingot in real time, continuously and without contact as it passes through. The system uses the laser light section method, in which lasers scan the surface of the ingot from all four sides. A detailed profile of the surface is created through precise measurement of the reflected laser beams. This data makes it possible to determine the dimensions of the ingot with great precision. The results are processed and logged immediately, ensuring seamless quality control. The so-called rolling skin of the ingot surfaces is removed by a peeling / milling process, and the head and side surfaces are trimmed to the final dimensions required by an edge cut.
After subsequent heating / homogenisation in deep and / or pusher furnaces, the rolling ingots are fed to the further rolling process.
rolling ingot measurement as specification / result for further production steps
Special Features
- adjustable design and software
- remote maintainability
- calculation of volume and weight

do you have any questions?
#IMS Expert
Martin Schulte im Walde
…These are particularly impressive due to their long service life and constant performance.
Our measuring systems allow our customers to always be one step ahead of the competition.
Our motto of “Precision out of passion and quality out of conviction” is the decisive criterion for the development of our high-precision measuring systems, many of which have been and still are world firsts.
To be allowed to actively support this pioneering spirit for more than 30 years, as well as our passion for precision, is a challenge anew for me every day, which continues to motivate and inspire me even after all these years.
For me, it’s not enough to just talk about the matter. You have to speak to the people and therefore it is my personal goal to guide you through the buying process with the quality of my advice and my support, to develop with you exactly the measuring system that is right for your specific measurement tasks and that has been specially tailored to your individual application.”
Reserve your personal consultation appointment now!
Choose between a scheduled call back, a Teams video conference or simply use our contact form.
We look forward to hearing from you!

Rolling Ingot Dimension Measuring System
Rolling Ingot Dimension Measuring System
Technical Information
Material data
Typical thickness range:
400 up to 600 mm (but not limited to)
Width:
800 up to 2,700 mm (but not limited to)
Length:
up to 9 m (but not limited to)
Measurement system data
Gauge type:
fixed mounted, non-traversable measuring point
Sensor type:
3D sensors consisting of line lasers and CMOS cameras
Measuring dynamics
Sampling speed:
25 ms / scan
Measuring dynamics
Width of material (2-Sigma):
+/- 1mm
Length of material (2-Sigma)
speed sensor + two:
± 5 mm plus 0,01% of ingot length
Material thickness profile / contour (2-Sigma):
+/- 0.5 mm
Measure.Inspect.Detect.
Product Catalogue for
Aluminium Rolling Mills
- Learn more about the product portfolio of our high-precision measuring systems for aluminium hot strip rolling mills and cold strip rolling mills
- Standard systems for measurement and detection of slab dimension, thickness, thickness profile, length, width, temperature, speed, 2D surface inspection as well as various special systems
- Special designs possible on customer request
